
Hello there! Let's get right to it, shall we?


A while back, I shared this photo on Instagram and today I'm happy to announce that we're going to broach this subject!

I don't know if this happens to you, but I often stumble upon darling, vintage, solidly built, sewing machines at thrift stores and while some (maybe most?) people would see a heaping pile of heavy junk, I see a gem. They come in taupe, mauve, mint green, pink, turquoise, avocado green, mustard yellow, brown, red, sky blue, chartreuse and many are two toned. I mean, this is no mystery, we know I love vintage sewing machines. So it's also probably not a surprise that if I can scoop one up for $20, $15, heck, even $5, I think it's worth a little elbow grease to get it up and running.
If you've found a vintage sewing machine and want to shine it up and make it run beautifully, you are in the right place. Also, I'd love to see a picture of it, so you should post one to the PDG Facebook page, or shoot me an email at hannah@palindromedrygoods.com so that I can swoon over your treasures.
Disclaimers (because I really don't want a lot of angry, screw driver wielding sewists sending me emails):
Before applying any cleaning product to the machine, test in an inconspicuous place.
I highly recommending reading through this entire tutorial BEFORE you begin.
The machine should be unplugged when you do this.
Your machine WILL look different than mine and therefore you will have to take most of these steps with a grain of salt. Reference your manual for part names & locations, it'll be immensely helpful! I'll be using two different machines through this tutorial to show you some variety.
Just so we're clear, I CANNOT guarantee that following my steps will get your sewing machine up & running if it is not already. I am also NOT a sewing machine mechanic and although I have no formal training with disassembling & reassembling sewing machines, I spend a lot of time doing it and am happy to share my knowledge with you! If all else fails, you may need to take your cute (probably very heavy) sewing machine to a professional and ask for help.
*** BEFORE YOU BEGIN!!! I'm not yelling, but I am speaking firmly here. Heed my warning, y'all! Take pictures of your sewing machine with your phone (or a digital camera where you can look back at the photos) as you move through this process. LOTS of pictures. Why? Because I'll be showing you how to dismantle the entire exterior of your machine, and if you take pictures, you'll know how to put everything back together. If you remove a metal plate, take a picture of what's behind it. If you remove screws, take a picture of what they look like and where they went. If you remove a gauge, take a picture of what it was attached to. You get the idea.***
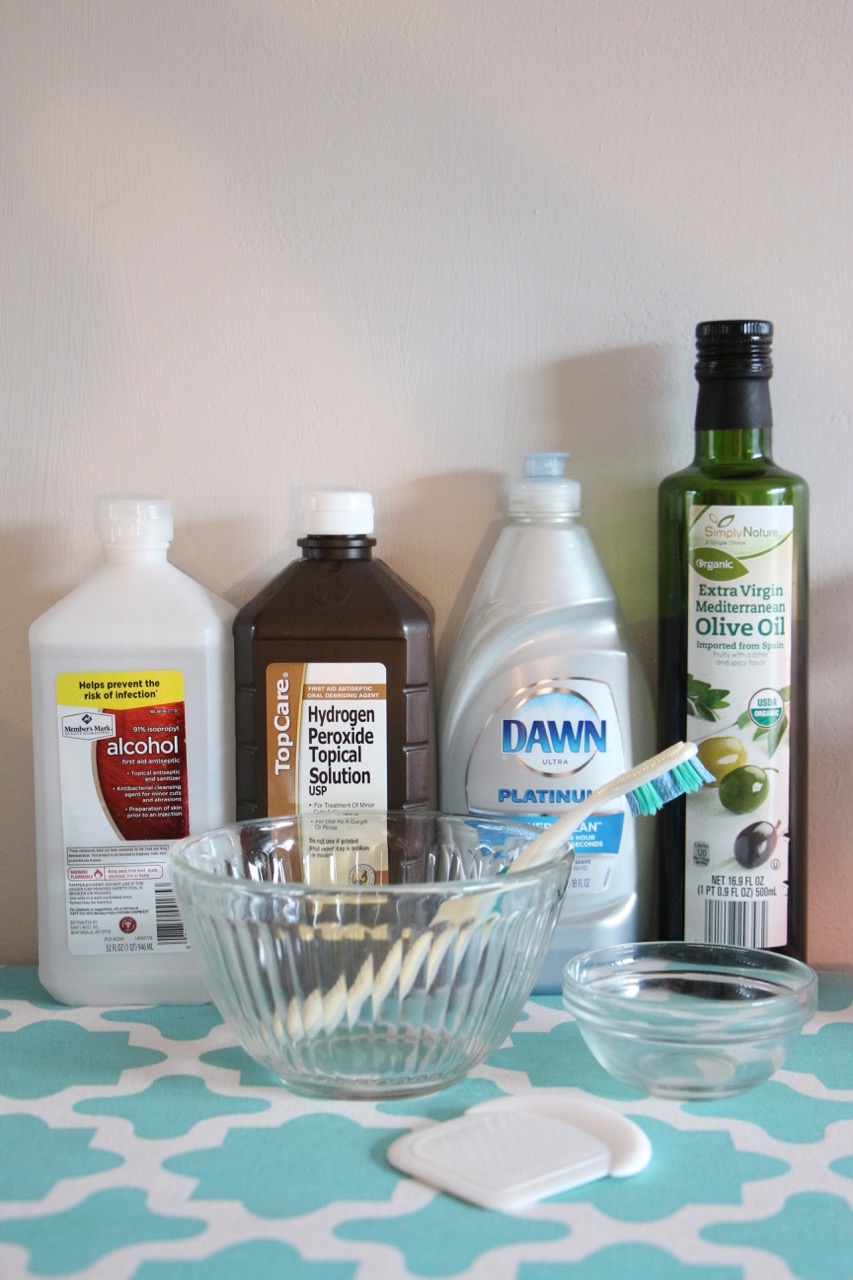
What you'll need:
- Paper & a pencil (not pictured)
- A selection of screwdrivers in every size & type you can find. I recommend buying an eye glass repair kit so that you have some teensy tiny screwdrivers. You can also find a screwdriver kit specifically for sewing machines at most craft stores & sew-n-vac stores, that will work too.
- WD40. I need this like three times a week for non-sewing related things too. Gotta problem? WD40 will fix it.
- A sponge
- A rag that can get really dirty / greasy / grimy
- Pliers
- Soft & coarse brushes. This could include old toothbrushes, or paint brushes. Anything that can get dirty that you can use to scrub in nooks and crannies.
- Steel wool (not pictured).
- Dish detergent.
- Hydrogen peroxide. Whitens more than your teeth, folks.
- Rubbing alchohol.
- Bowls in various sizes.
- Warm water
- Olive oil
- A plastic kitchen scraper (or a plastic spoon)

What to do:
1. Take a picture of your machine in it's original state. This way you can note where all the external plates, dials, buttons, levers, etc. go.
This is Estelle before her bath. Dirrrrr-ty.


2. Here is where taking pictures is CRUCIAL! Take a picture after each piece you remove. This way you can look back later to reference what order the pieces were assembled in. Don't rush, take your time, remove each piece, photographing as you go. Using your various screw drivers, remove the:
- needle
- presser foot
- top cover of the sewing machine
- the name plate, if you can. Mine says "Regent".
- the stitch length & width knobs
- the needle plate
- the entire external tension mechanism (see photo below). Side note about this: don't be scared! As you remove each piece place it on a sheet of paper in the order it came off the machine.
** Additionally, I placed each screw on this same sheet with a description of where it came from and then took a picture of the sheet of paper with all the parts! **
 |
| Estelle looking a bit naked. |


In some cases (typically with the stitch length & width adjustors, you'll find that you have to remove a knob or lever first, before the exterior plate with come off. Look for tiny hidden screws on the side of knobs, or cotter pins on the inside of the machine that are holding these parts on. To remove the cotter pin, grab firmly onto the looped end with pliers and pull it out. If removing any part as you go makes you incredibly nervous, don't remove it. Just clean the exterior as well as you can and move on. No need to stress yourself out!
 |
| Cotter pin holding the stitch width lock knob in place. |
 |
| Small screw holding the stitch length knob in place. |
If you find that something won't come off, or a screw won't budge STOP and spray some WD40 on it. You really don't want to damage the screw or piece by continually trying to remove it. Let the WD40 sit for a few minutes and come back to it.

3. Clean all the parts. Soak anything that's white (or looks like it was white...) in hydrogen peroxide, or vinegar. I wouldn't soak anything in bleach, just because it's so harsh and with older pieces I would hate for the bleach to permanently damage whatever material the pieces are made of.
Soak anything thats greasy, caked with dirt, or (in the case of Estelle) coated in nicotine in dish soap and warm water and scrub gently with a sponge or toothbrush. I let some of my pieces soak for up to 30 minutes before I found I could get them clean. Whoever owned Estelle before me, realllly loved cigarettes.
If the machine has stickers, or anything sticky, spread a thin layer of olive oil on it, let it sit for 10+ minutes, and then gently use a plastic kitchen scraper to remove it.
Apply some soapy water to a soft cloth and wipe the entire machine down. Use a toothbrush to scrub any decorative pieces you couldn't get off, or any areas that are particularly dirty.
Soak and scrub the screws. This is why I took a picture of the piece of paper with all the screws on it earlier! This way you can wash all the screws, dry them and then put them back where they belong. I used a toothbrush to scrub each screw clean.
4. Reassemble the machine. Using all those photos you took (you did take them, right?!), put the machine back together. If you can't remember the order of how some of the pieces go, you may be able to find a very thorough diagram in your manual.
5. Clean the internal parts of the machine using this tutorial.
* Please note that because you will have taken everything apart and put it back together, you will have to adjust all your settings. The tension will likely be WAY off, so please be patient as you re-set the tension, stitch length, stitch width, dogfeed position, etc. *
6. Check the belt, bobbin winding mechanism & motor. Most vintage machines have a rubber belt on the external right hand side of the machine. If this belt is cracked, frayed or missing, you'll need to purchase one, or take your machine to have a professional install one for you.
 |
| Belt |
Additionally, there may be a small rubber wheel on the right hand side of the machine as part of the bobbin winder. If this wheel is cracked, broken or missing, your bobbin winder likely will not work and you will need to find a replacement rubber wheel.
 |
| Rubber wheel part of the bobbin winder |
Ok. The motor. On some machines it is in the back, on the outside of the machine, and on some machines it is inside the body of the machine. Both of my machines have external motors. I have no fear when it comes to sewing machines, so I disassembled my motor (because it sounded horrible), reassembled it and found that it ran much quieter. I followed this YouTube tutorial. If you are brave, then "Go, my friend, go!" and take it apart. I'm not going to walk you through that because I'm not an expert in that process, but I fully admire your confidence and will encourage you to do it...if you want to.
 |
| Exterior motor |
If the motor does not hum when the machine is plugged in and the pedal is pushed, you might have a problem. If it sparks, smokes or is extremely loud, you may be able to solve the problem (or at least improve it), but I can't make any promises.
If your machine came in a table, make sure that the plugs are in the correct outlets and that the power cord that goes to those outlets is plugged into a wall outlet. The outlets in the table should be labeled "motor" and "light".

Lastly, there are some things that may need to be replaced on your machine:
- the lightbulb
- the powercord
- the foot pedal
- the belt
- the rubber wheel on the bobbin winder
- the motor (yes, these can be replaced!)
-thread spool pins (mine were missing)
-thread spool pins (mine were missing)
So remember this sad, grimy Regent?

Well, here she is post restoration!

I love a good before and after picture, you guys.

Her chrome shines, her whites have been (mostly) restored to white, you can actually read her plate (she's a precision, super de luxe, isn't that fancy?!), and her beautiful turquoise paint gleams! More importantly than how she looks, she also runs like a champ.
If you found this helpful, please feel free to share a link to this post with others, and pin it to the great world of Pinterest!
For those of you curious about Estelle, here is an article on Japanese-made clone machines from the 1950s.
If you have questions about any part of this, please ask away in the comments below and share your before and after pictures!


Thank your for sharing! I love a vintage find...I have not been as adventurous as you were in this tutorial, but there is nothing to lose on a $5 machine! Happy sewing!
ReplyDeleteHello, Lorrie! Thanks for the comment. If you decide to be adventurous and restore one, please share your results. I'd love to see how it turns out!
DeleteI have an old treadle machine that was great for sewing tough fabric like denim and leather. I haven't used it since I moved because something happened to it. You have given me an incentive to have a look at it.
ReplyDeleteOh, those treadle machines are great for that. They're the sturdiest of all! Best of luck in getting it to work and don't hesitate to ask me any questions you may have. Happy sewing!
DeleteI picked up a Singer Genie (so retro!) and it will definitely benefit from some TLC!
ReplyDeleteSo cute!! I do hope you'll be able to follow this tutorial and restore her to her original beauty. Thanks for reading!
DeleteI admire your talent and determination, I to enjoy fixing and restoring old things especially sewing machines I always thought of them as a genius invention. That was one heck of a job you did on the old REGENT. I hope to follow your posts often I just stumbled on this post today on Pinterest and enjoyed it very much. Keep up the good work!
ReplyDelete