 |
| Photo by Ryan Greenleaf Photography. |
Hello everyone!
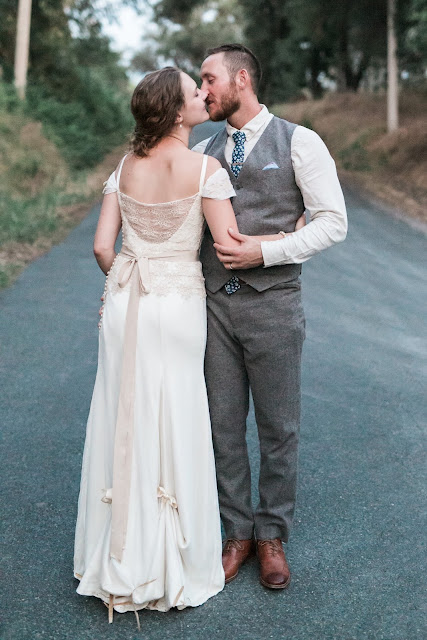
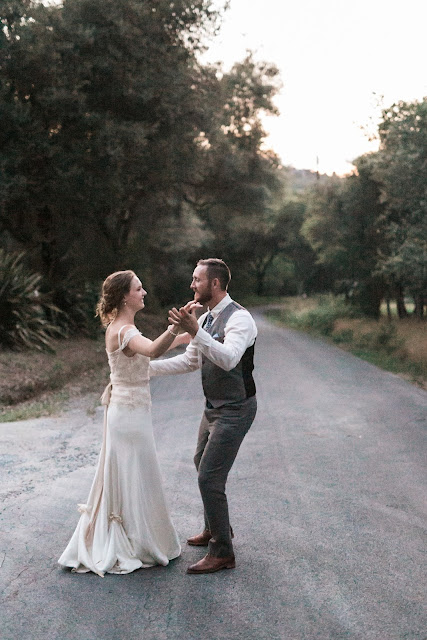
A lot has changed since I last visited with y'all. My handsome, sweet, hardworking, husband Dan and I were married a month ago and I am so excited to share the process and final result of making my wedding dress! Wedding photos by Ryan Greenleaf Photography, who I highly recommend.
If you follow me on Instagram (@palindromedrygoods) you may have seen some updates about the process of constructing my wedding dress. Though I helped, my mother is the artist, seamstress and visionary behind my beautiful dress. Since she doesn't blog, I'll happily brag about her and her talents. Mom, you are seriously inspiring and there's no possible way I could ever say 'thank you' enough for putting so much time, energy and love into my wedding dress.
 |
| Photo by Ryan Greenleaf Photography. Read more about my Mom's handmade mother of the bride dress here. |
We began the process in June of 2015 and started by trying on wedding dresses. We went to a bridal boutique in Sacramento and I had an idea of what I thought I wanted, so I tried on dresses with similar silhouettes and we examined how the manufactures had layered the fabric, how the bustles had been made, zipper placement, foundation construction and more. I have to say that I was pretty disappointed with the quality of most of the dresses. Many were polyester satin and nylon tulle. Um, what? If I'm going to pay $2500 (likely more) for a wedding dress, I would really like it to be silk and silk...and more silk, or at least cotton!
Anyway, after deciding on the general shape, we went home and sorted through our pattern collections to find things that we could alter.
The 1950's Simplicity pattern on the left was used for the foundation bodice because of the sweetheart neckline. The 1950's McCall's pattern on the right was used as the bottom of my dress, by extending the length between the waist and knee so that the 'trumpet' occured at the bottom. We also removed width from the 'trumpet' in the front so that the skirt would fall straight down in the front. We added even more length to the pieces in the back to create the train.
We purchased silk satin, pearl buttons, rayon bemberg, grosgrain ribbon (for my belt), and the most exquisite, handmade, french, 100% cotton lace from Britex Fabrics in San Francisco. I didn't cry when I tried on wedding dresses, but I did cry when I found the right lace. It is so, so, so, beautiful. It was quite pricy, and so I could only afford 1 1/8 yards, but I knew my mom and I could figure something out to utilize every little bit.
I also decided that I didn't want the dress to be shiny, so I purchased five yards of silk mesh from The Tin Thimble and we added this as a final layer over the top of the silk satin for the skirt.
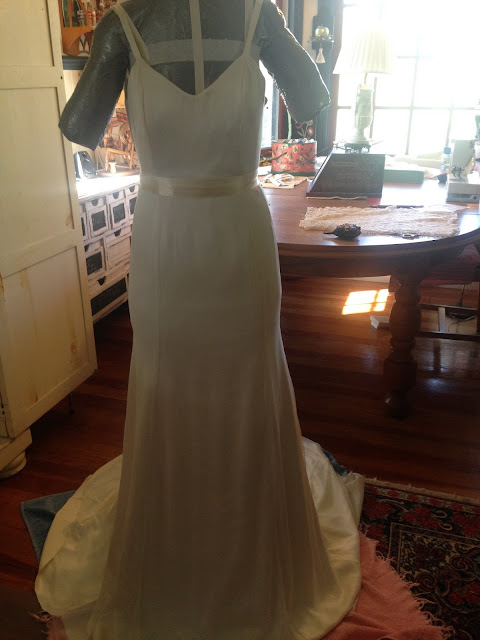
So how'd we make it? Well, after we had drafted all the pattern pieces, we started by making a 'muslin' out of pattern-ease. Then we made adjustments around the bust, waist, hips and the length. My mother marked these adjustments on the mock up and then copied them onto the real pattern pieces.
 |
| Makeup free, after midnight, wearing a very stiff version of the dress. |
One of the largest challenges we faced was figuring out how to alter the pattern pieces so that the most volume in the skirt occurred after the bottom of my hips. I wanted the skirt to begin flaring into the train just after my butt and this took some time to figure out, but we did it.
Next, while I was back in West Virginia, my mom made the entire dress out of cotton (the picture above doesn't have the bodice attached yet) and then she waited until I flew back to the west coast to try it on. After we knew it fit, she cut all the pieces out of the 'real' fabrics including the rayon (used as a lining), the satin (used for the bodice, skirt and to self-line the bodice), and the silk mesh (used as an overlay for the skirt).
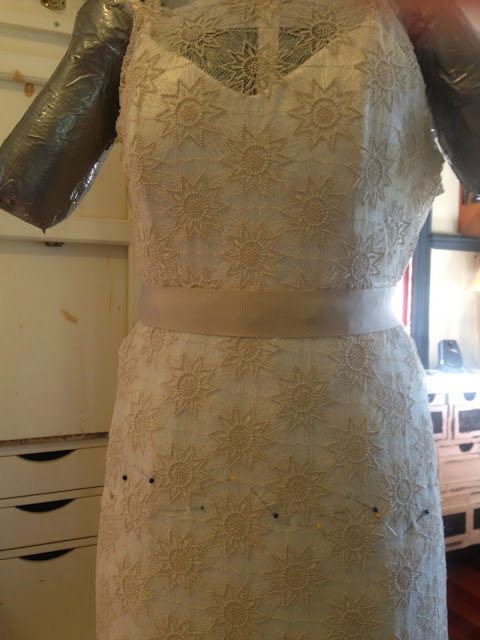
Lastly, we began to play around with the lace and sleeves. Considering the limited amount of lace we had, we didn't cut any of the lace until we were absolutely sure about what we wanted.
The bodice overlay ended up being a rectangle of the lace that started at the front side seam, wrapped around my torso and ended at the back side seam, where the pearl buttons are. I really liked the way dresses with bones felt when I tried them on at the bridal boutique so we added five flexible bones in the foundation of the bodice: one in the center, one over each boob and one on each side-front of the bodice. Originally, we had the bones too long which caused the bodice to twist and caused an unsightly bump at the stomach when I sat down. We shortened them and that solved the problem.
 |
| Photo by Ryan Greenleaf Photography |
The sleeves were small rectangles of the silk mesh used as the skirt overlay with motifs from my lace sewn on. A small elastic string at the top of each sleeve held it onto my arm but still allowed me to wave my arms about, hug, and dance.
 |
| Photo by Ryan Greenleaf Photography |
My mother sewed on each pearl button by hand, hand hemmed the dress, and hand tacked the layers of the skirts together at a few of the seams to keep everything from twisting. She sewed a zipper into the side seam that ended up being completely hidden by the buttons and loops.
Lastly, we had to figure out the bustle. I put the dress on, my mom sat on the floor and we pinned, unpinned and repinned until we found a solution we both liked. We ended up pulling the longest part of the train underneath my dress and using a hook (sewn to the lining) and eye (sewn to the hem of the train). We then pulled up the additional length with four loops (two on each side) and connected the loops with satin ribbon.
 |
| Photo by Ryan Greenleaf Photography. |
 |
| Photo by Ryan Greenleaf Photography |
The medallion on my belt was hand beaded by my sister, Jill. She started with a single 'star' from my lace and filled it in with beads in varying shades of white and taupe to match my shoes and dress.
 |
| Photo by Ryan Greenleaf Photography |
 |
| Photo by Ryan Greenleaf Photography |
The dress is more gorgeous than what I had ever imagined and I seriously wish I could wear it every weekend. The fabrics we chose were of exceptional quality and made the dress heavy, drapey and comfortable. My mother went above and beyond (like she always does) and constructed one of the most elegant, beautiful, things I own.
Did you (or your mom, sister, grandmother) make your wedding dress? What problems did you face? Do you have questions about how we made mine? Comment below! I'd love to hear from you all.
Thank you so much for letting me share with you. More posts about the rest of our big day coming soon.
-Hannah


Hannah you look gorgeous (and your new HUSBAND(!) looks fantastic)! The dress is stunning and such a beautiful piece to have. The detail that went into the dress is amazing, and I am in complete awe of the craftsmanship- your mother did a wonderful job. Congratulations on your big day! Also, these photos are beautiful!!
ReplyDeleteThank you so much, Trish. It was such a great day! :)
DeleteWoow..You are looking awesome in this dress!!To find more deals Click here
ReplyDelete