Hello There! Thanks for joining me for this week's Sewcabulary, I'm glad you're here. This week, I'll show you how to sew five different finishing seams, without a serger.
Why finish your seams at all, you ask?
Well, firstly, they make the inside of your garment look professional and neat and if you're like me, you always want the inside to be as pretty as the outside.
Secondly, they prevent your fabric from raveling when laundered.
Thirdly, they can actually provide some structural importance, in the case of jeans, for example.
As my sewing knowledge has advanced, I find myself using finishing seams for nearly every project. If you're a beginning seamstress, don't be afraid! Now is a great time to learn these techniques and start incorporating them into those simple projects like pillowcases and curtains. If you're an intermediate or an advanced seamstress, these seams may be an overview for you, or perhaps one of them will be new to you! Comment at the end of the post and let me know if there is another one you'd like demonstrated, or if you sew one of the following seams differently than how I show you!
*We'll be using 5/8 seam allowance through this tutorial.*
We'll begin with a regular seam, just so we're all clear on what we're doing here.
I'd like to emphasize that while the seams I'm about to show you are done on small, sample pieces of fabric, please remember that these can be used on side seams (skirt front to skirt back, bodice front to bodice back, tote bag front to tote bag back etc.), and adjoining seams (adding a contrasting cuff onto the bottom of a curtain, or sewing up pillowcases) just to name a few.
Right sides together.
Pin. Sew a 5/8" seam.
Here is the resulting, regular, unfinished seam.
And this is what our regular, unfinished, seam looks like from the outside of your project.
1. The French Seam
This seam is great for sheer, lightweight fabrics such as voile, lawn, silks and lace. This is, hands down, the finishing seam I use the most. I use it to finish the majority of the dresses and blouses I make. I also finish all the pillowcases I sell on my Etsy store will french seams so that they don't unravel after being washed.
We're going to start with wrong sides together. If that seems weird to you, you're right, it is weird, but I promise I'm not leading you astray. Trust me!
Pin.
Sew a 3/8" seam.
Then we have something that looks like this. The picture below has both seam allowances pushed to one side.
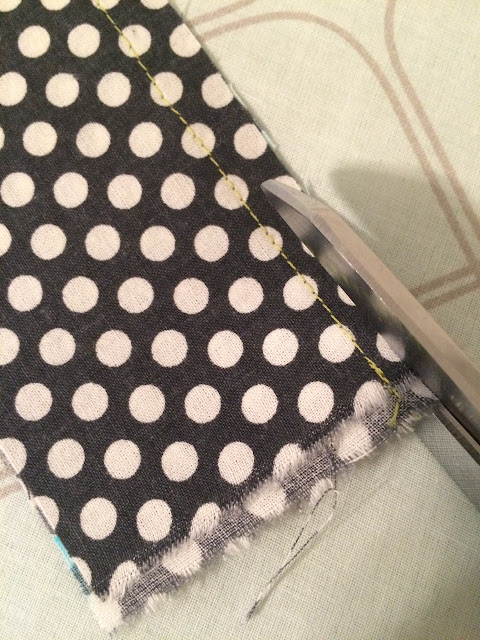
We're then going to trim both of the seam allowance to just under 1/4".
Then, fold the fabric right sides together and press.
Pin and sew again, this time with a 1/4" seam allowance.
Ta da! Now you have encased the original seam allowance inside the second seam.
The french seam is incredibly neat on the inside and doesn't change the external appearance of your project at all.
2. The Clean Finished Seam
This seam is excellent for light to medium weight fabrics. Because this seam results in visible seams on the outside of your garment, it is good to use for garments such as unlined jackets and skirts where top-stitching can add be a cute detail. It can, of course, be used for plenty of other projects as well.
We'll start with right sides together. Pin.
Sew with 5/8" seam allowance.
Press seam allowance open.
Down each edge of the seam allowance, turn under 1/4".
It will look like this when both sides have been folded under.
Pin.
Stitch down each side of the seam allowance, just a hair from the edge.
Your resulting finished seam will look like this on the inside!
And will look like this on the outside!
3. The Flat Felled Seam
This great finishing seam is often used in denim jeans (take a look at the seam on the inside of your leg if you have jeans on. That's a commercial version of what I'm about to show you!). It is also good for sports clothing and kids clothes because it's tough and adds strength to the seams of your garments.
We'll start with right sides together. Pin.
Sew with 5/8" seam allowance.
Press open seam allowance.
Trim one side of the seam allowance to just under 1/4".
On the other side of the seam allowance, fold over 1/4".
Press.
Then, fold the folded edge over the trimmed 1/4" seam allowance.
Pin.
Stitch down the edge of the folded-over seam allowance, just a hair from the edge.
And your resulting finished Flat Felled seam will look like this on the inside.
And will look like this on the outside.
4. The Bias Bound Seam
This finishing seam looks so darn cute when done in contrasting bias tape. It's perfect for unlined coats, skirts and jackets. It is best for medium and medium/heavy weight fabrics.
Start with right sides together. Pin.
Sew with a 5/8" seam allowance.
Iron out seam allowance.
Cut a piece of bias tape 1/2 longer than your seam.
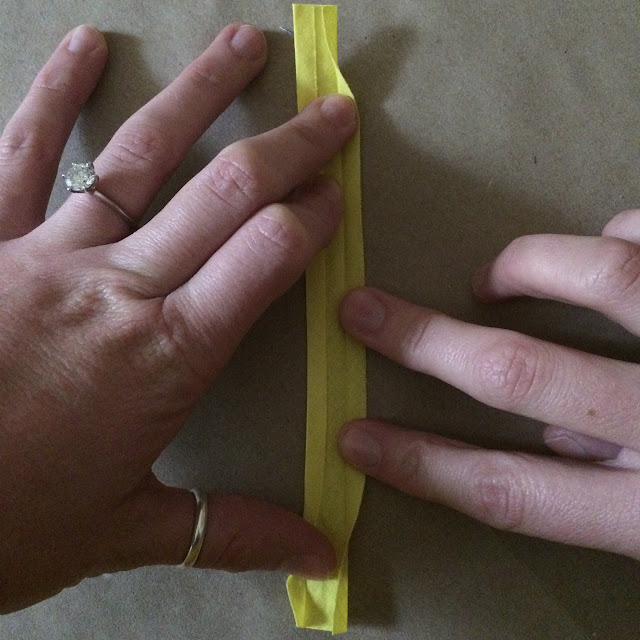
Fold out right edge of bias tape and press.
Place your fabric right sides together, leaving one seam allowance out.
Place your bias tape over the seam allowance, long edges even. Pin.
Stitch in the "ditch" left by the fold of the bias tape (that's what my scissor tips are pointing to). You'll be stitching through two layers: one layer of bias tape, and one layer of seam allowance.
Your seam should look something like this.
Fold bias tape over the seam you just made.
Flip the whole thing over. Now you'll be looking at the opened seam allowance. Your main fabric pieces are still right sides together.
Fold half of the bias tape over the raw edge of your seam allowance.
Iron and pin.
Stitch along the edge of the bias tape (the edge towards the original seam).
When it's all finished, one of your finished seam allowances will look like this!
Repeat on the other seam allowance and then both finished seams will look like this on the inside!
This finished seam doesn't make any changes to the external appearance of the project. Keep in mind that this creates a bit of bulk, and is not suitable for very lightweight or sheer fabrics because the seam finished would create 'lines' that you could see from the outside.
5. The Self Bound Seam
I'll be honest. This is not my favorite finishing seam. It's a bit tedious, but it does make an excellent finish on lightweight fabrics that don't ravel easily.
Start with right sides together.
Stitch a 5/8" seam.
Press open seam allowance.
Trim one side of the seam allowance to 1/8".
Fold over the edge of the other side of the seam allowance 1/4" and press.
Tuck the 1/8" seam allowance into the folded over seam allowance.
Fold the folded edge over the 1/8" piece again and press. (Lots of folding goin' on, eh?)
Push the main fabric pieces to one side and stitch along the edge of the folded seam allowance that is closer to the original seam.
When you're done, it should look like this! You'll have two rows of stitching very close to one another.
This is what it looks like with the main fabric pieces folded out.
And this is what it looks like on the outside. This seam doesn't change the outside appearance.


Wow, this is another really great post! I've never actually done the last way you show, but I can imagine that it is tedious! :) Lisa
ReplyDeleteIt really is useful in some applications, but I find myself avoiding it, haha. I'm so glad you're enjoying my posts. I appreciate the comments!
DeleteHello! This is my first visit to your site. I have needed help with prettying up my seams. With the french seam, do you have to add additional seam allowance for this? Say if I was making a pillow and used the method, would I need to make adjustments to how much fabric I need? Hopefully my question is not making this more confusing than I already am. Ha! I look forward to exploring the rest of your site.
ReplyDeleteHello there! Firstly, thank you so much for stopping by and reading the post. I hope you enjoyed it! That is such a great question, I'm glad you asked. No, a french seam should not require you to add seam allowance. Let's say you're sewing with 5/8" seam allowance. Your first seam (with wrong sides together) will be 1/4" (for math's sake, remember that 1/4 is the same as 2/8), then, your second seam (with right sides together) will be 3/8".
Delete2/8 + 3/8 = 5/8
Or, if you were sewing with 1/2" seam allowance, your first seam would be 1/4", you could then trim it just a tad (to be sure it is entirely hidden within the second seam), and your second seam would be another 1/4".
1/4 + 1/4 = 1/2
Does that help? Let me know if you have other questions. Enjoy exploring the other posts, there's new stuff coming out soon!
-Hannah