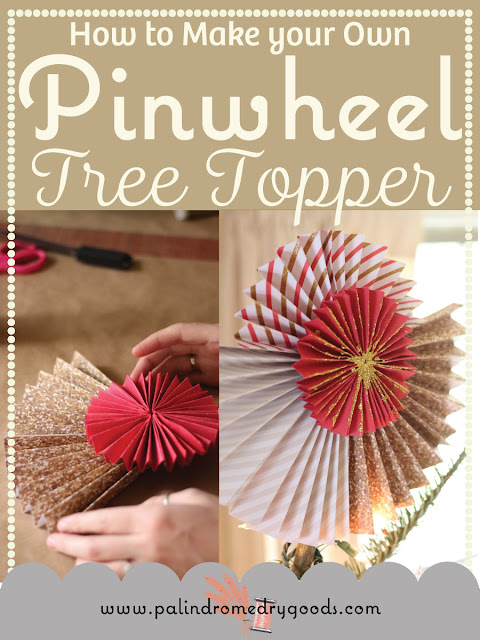
Last week's post was a quick, simple, tutorial on how to make beautiful pinecone ornaments. This week, I'd like to share how I made our large pinwheel tree topper. You could also take this tutorial and use it to make small pinwheels as ornaments. I made many small wheels out of pages from books (cheap, paperbacks in poor condition from Goodwill for fifty cents), printed and plain colored paper.
What you'll need:
A vinyl tablecloth or a large sheet of craft paper (to protect your workspace and contain the glitter), paper (any weight will do), craft glue (like Aleene's, but any kind will do), glitter, a bowl (to catch the glitter), craft sponge or a paintbrush (that you're OK with getting glue on), scissors, glitter, wire or ribbon (to connect the topper to the tree), and a ruler.
What to do:
Cover your workspace with the tablecloth or craft paper.
I started with one 12" x 12" piece of scrapbook paper. If you're making the topper, I suggest you start with the same. If you're making small ornaments, you will need three to four smaller sized (4.5" x 6" is what I used) pieces of paper. Begin by using a ruler to make your first fold. The ruler will help you make sure that you fold the paper evenly the first time, and if you're using thick paper, it can help you make a nice, neat, folded edge.
Keep folding the paper back and forth until you have an accordion-looking piece of paper.
Then, take that accordion, and pinch it in the middle.
Then, fold it in half.
Spread glue along one edge where the fan meets, then place the edges together, and use a couple of paper clips to hold the fan together while the glue dries.
Then, make one more fan from a 12" x 12" piece of paper, one slightly smaller fan from a piece approximately 8" x 12" and a small pinwheel from four 6" x 4.5" fans glued together. Glue the three fans together, but don't glue the pinwheel on yet!
You'll have something that looks like this:
Here, if you look closely, you can see the paper clips I've placed to hold the topper together while it dries.
Now, let's add some sparkle! On the small pinwheel, run glue along as many edges as you'd like. The glitter will adhere to the glue, so only put as much glue as you want glitter.
Spread the glue out using your paintbrush or sponge. Add more glue if you'd like.
Over a bowl, sprinkle glitter onto the glue.
Tap off extra glitter into the bowl.
Then, place the center pinwheel aside to allow the glue and glitter to dry. In several hours, when the glue on all your pieces have dried, place a large glob of glue (if you have hot glue, use it for this!) in the center of your pieced-together fans, and then place the pinwheel on top of them. Let dry.
After you've attached the pinwheel to the center of the topper, and it has dried, measure the diameter of the branch that you'll place the topper on. Cut a piece of ribbon the size of the diameter + 1 inch. Find the folds closest to the center of your topper and, on the backside, glue your ribbon, in a loop, to the paper. The ribbon should extend 1/2" on each side into the 'grooves' on each side of the center fold. Again, use paperclips to hold the ribbon in the glue while it dries. I made two loops, one at near the bottom of my topper and one near the top.
Here is a better picture of the back when the topper is actually on the tree:
And there it is! Your beautiful tree topper. I love this project because you could make a new one each year, which is a great option for those of us who change the theme and colors of our tree annually. You could do many different shapes and colors and textures. Think: one enormous pinwheel in a single color as the back and a series of smaller pinwheels stacked on front in graduating colors (to get a sort of ombre effect). Oh! You could make it with heavy-weight glittered scrapbook paper, and it would be extra sparkly. You could make them entirely out of sheet music, or your favorite Christmas story that needs to be repurposed.
And here are the smaller pinwheels as ornaments. I think they're so darn cute!
If you make some of these, either a topper or ornaments, I'd love to see what your final products! Also, if you have questions about how to make them, or need clarification, feel free to shoot me an email! Click "Say Hello" near the top of the page to access my contact info. Merry Christmas and Happy Holidays everyone, I hope this crazy time of year is treating you all well. Thanks for reading!


No comments